Vivado is the Hardware Development suite used to implement a design in Xilinx FPGA. In this post, is reported how to create a Vivado project using the Graphical User Interface (GUI). This is the fastest and common approach to creating a project in Vivado.
Vivado GUI performs the complete design flow for a Xilinx FPGA:
- Simulate
- Synthesize
- Map
- Route
- Analyze Timing
- Create a bit-stream FPGA configuration File
- Configure FPGA
- Debug the FPGA using ILA (Integrated Logic Analyzer)
Vivado also allows the user to perform the design flow using TCL language.
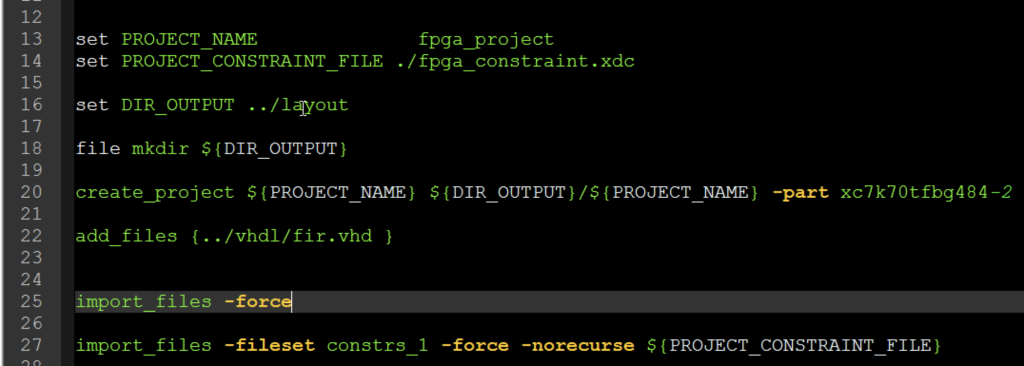
The TCL scripting is very useful to create a compact and deterministic way to realize a layout flow in FPGA. This approach is adopted by expert users. You should take it into consideration even if you are not an expert. In this post, we are going to see a simple example that can be used as a template for the Vivado TCL project script. The project created using the TCL script can be also opened and edited using the Vivado GUI. All the analysis as timing, area, etc can be performed using GUI after design flow completion.
Read More
