Vivado is the Hardware Development suite used to implement a design in Xilinx FPGA. In this post, is reported how to create a Vivado project using the Graphical User Interface (GUI). This is the fastest and common approach to creating a project in Vivado.
Vivado GUI performs the complete design flow for a Xilinx FPGA:
- Simulate
- Synthesize
- Map
- Route
- Analyze Timing
- Create a bit-stream FPGA configuration File
- Configure FPGA
- Debug the FPGA using ILA (Integrated Logic Analyzer)
Vivado also allows the user to perform the design flow using TCL language.

The TCL scripting is very useful to create a compact and deterministic way to realize a layout flow in FPGA. This approach is adopted by expert users. You should take it into consideration even if you are not an expert. In this post, we are going to see a simple example that can be used as a template for the Vivado TCL project script. The project created using the TCL script can be also opened and edited using the Vivado GUI. All the analysis as timing, area, etc can be performed using GUI after design flow completion.
Vivado TCL Project Script architecture
The Vivado TCL architecture replicates the same steps we need to perform when we operate in the Vivado GUI. The TCL template implements the following steps:
- Create a project
- Add source files to project
- Add constraint files to project
- Design Synthesis
- Design Map&Route
Vivado TCL script Create project
The TCL command syntax used to create a Vivado project is:
create_project PROJECT_NAME DIR_OUTPUT_NAME -part FPGA_DEVICE
PROJECT_NAME: is the name of our project.
DIR_OUTPUT_NAME: Name of the output folder where the project will be created.
FPGA_PART: device we want to use.
An example of create_project usage is:
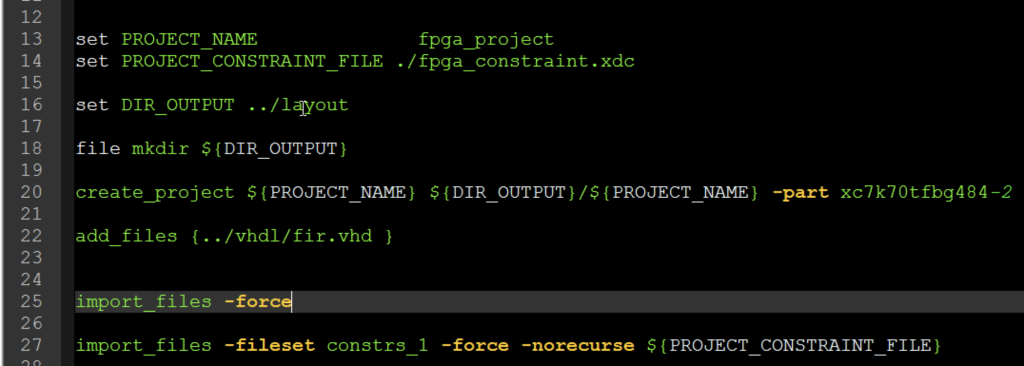
create_project ${PROJECT_NAME} ${DIR_OUTPUT}/${PROJECT_NAME} –part xc7k70tfbg484-2
where we are using local variables to create a generic Vivado script template.
Add Source and constraint files in Vivado TCL Project
The TCL command syntax used to add source files in a Vivado project is:
add_files { FOLDER/FILE_NAME.vhd }
import_files -force
import_files –fileset constrs_1 –force -norecurse ${PROJECT_CONSTRAINT_FILE}
Update the compile order of the design sources in the current project, or in the specified fileset:
update_compile_order –fileset sources_1
Vivado TCL script start synthesis
After importing the design and constraint files, we need to start design synthesis:
launch_runs synth_1
wait_on_run synth_1
open_run synth_1 -name netlist_1
Note that we need to wait for synthesis completion. The script is running a task, so the task must be completed before going ahead.
Vivado TCL script start implementation
After design synthesis, we can launch the design implementation as Map&Route
launch_runs impl_1 –to_step write_bitstream
wait_on_run impl_1
start_gui
The last command opens the Vivado GUI with the implemented design. You can use the GUI to perform all the analyses.
Vivado TCL script start implementation
To start the TCL script, you need to open a DOS shell and type the following command:
vivado -mode tcl -source TCL_NAME.tcl
pay attention to the current folder where the script is executed. The current path of the terminal is the current path in the TCL script. Take it into account if you are using a relative path in the TCL script.
Vivado TCL script example
Here below is a summary of the Vivado TCL command reported above. You can use this script as a template for your Vivado design implementation. This Vivado TCL script has been derived from the example you can find in the Vivado installation folder used to demonstrate an RTL-to-bitstream Vivado project flow. This TCL script will create a project, copy sources files into the project directory, run synthesis, implementation, and generate a bitstream. It will also write a few reports (timing and power) to disk and open the GUI when finished.
Remember that you need to create a constraint file if you want to generate the timing report.
A simple example of timing constraint file is:
create_clock -period 5.000 –name CLOCK200 –waveform {0.000 2.500} [get_ports i_clk]
where we are creating a clock constraint of 200 MHz. The timing group is “CLOCK200”, and the clock signal is the input port “i_clk”.
The Vivado TCL script template is:
set PROJECT_NAME              fpga_project
set PROJECT_CONSTRAINT_FILE ./fpga_constraint.xdc

set DIR_OUTPUT ../layout

file mkdir ${DIR_OUTPUT}

create_project ${PROJECT_NAME} ${DIR_OUTPUT}/${PROJECT_NAME} -part xc7k70tfbg484-2

add_files {../vhdl/fir.vhd }


import_files -force

import_files -fileset constrs_1 -force -norecurse ${PROJECT_CONSTRAINT_FILE}

# Mimic GUI behavior of automatically setting top and file compile order

update_compile_order -fileset sources_1

# Launch Synthesis and wait on completion
launch_runs synth_1
wait_on_run synth_1
open_run synth_1 -name netlist_1

# Generate a timing and power reports and write to disk
report_timing_summary -delay_type max -report_unconstrained -check_timing_verbose -max_paths 10 -input_pins -file ${DIR_OUTPUT}/syn_timing.rpt
report_power -file ${DIR_OUTPUT}/syn_power.rpt

# Launch Implementation
launch_runs impl_1 -to_step write_bitstream
wait_on_run impl_1

# Generate a timing and power reports and write to disk
# comment out the open_run for batch mode
open_run impl_1
report_timing_summary -delay_type min_max -report_unconstrained -check_timing_verbose -max_paths 10 -input_pins -file ${DIR_OUTPUT}/imp_timing.rpt
report_power -file ${DIR_OUTPUT}/imp_power.rpt


# comment out the for batch mode
start_gui
Conclusion
The TCL commands presented above can be used to create a Vivado TCL to start a new design using Xilinx Vivado. The TCL script approach is very useful to create a portable design over different versions of Vivado aiming to start a new design from RTL source files. The TCL script copies all the source files into the project directory so the layout project directory will be self-standing containing all the design source files and project files.
Reference
[2] https://www.xilinx.com/products/design-tools/vivado.html
UG975 is a good reference for using a script for running Vivado in either project or non-project mode. Also, there are many reports that are available to help assess the results. Building the script slowly and using reports helps save time in the long run by making sure the files are read and the constraints are complete (or as complete as you want them) and correct before running a long place and route.
https://www.xilinx.com/support/documentation/sw_manuals/xilinx2016_2/ug975-vivado-quick-reference.pdf
Thanks.